The Nine are heavily involved with the Prophecy dungeon and as such, everything is a bit weird. The recommended Power level for the dungeon is 1040 but I’d suggest not attempting this if you and your fireteam are below 1000 Power. If the two other members of your team are 1010+ and you’re hovering around 980, you might get away with just taking care of adds and collecting Motes while they take care of the bigger enemies. The Prophecy dungeon is free for all players - including New Light players - so grab two pals and get ready for a bit of fun. If you head to the Tower, you’ll find the dungeon is located near where the Drifter hangs out, so make sure you assemble your fireteam before you get started.
Destiny 2: Season of Arrivals - Prophecy Dungeon guide
Ideally, you’ll want to bring some decent crowd control weapons alongside a powerful weapon in the range of 1040 to 1060 Power, as the boss at the end is a higher level. It would be smart to bring decent close-quarters and heavy weapons, use mods that inflict more damage to Taken enemies and equip armour mods that increase your Discipline so you can fire out grenades faster. There are loads of secrets hidden around the dungeon, so if you’re not worried about beating it in a certain timeframe, explore every nook and cranny you can to find hidden chests that contain Trials of the Nine armour. The first challenge you encounter is opening the doors. What you need to do is collect Light and Dark Motes and deposit them in the corresponding banks. To gather Mote, you’ll need to kill the Knight Echos. To get the different kinds of Mote, try and kill these enemies either when they’re in the dark or have light shining on them - that will influence which kind is dropped.
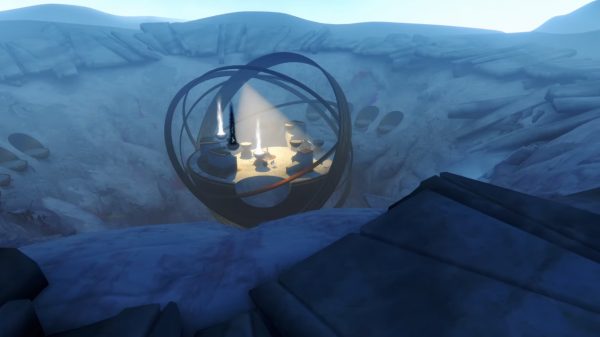
Both doors will open once you’ve deposit enough Motes, so look up to your left and jump up the rocks until you reach a spherical arena. The next section begins in much the same way, so coordinate amongst yourselves whether Light or Dark Motes take priority. As you deposit each type of Mote, the rings around the room will move about which changes the light and dark around the room. Once enough Motes are cleared, the Boss’ shield will lower and you’ll have a short window to deal some damage. The Phalanx takes a few phases to defeat, so repeat the process until its down and watch out for Knights and other lower enemies.
Once the Phalanx is down, stand in the purple circle to get into the next area. You’ll need your Sparrow for this section and you’re looking for glowing rings with Taken enemies around them. Once they’re dealt with, you’ll see in the centre below a pinkish ring there’s a Toland whisp floating around. It’ll disappear for a moment but then you’ll see in which direction it’s heading, so follow it closely. You’ll come across another ring surrounded by Taken Blights, so get rid of them. Be warned that there are some invisible Minotaurs in the area that could potentially make life a bit difficult. Rinse and repeat this section a few times and eventually a message will appear on-screen that reads “The way is open”. You’re on the lookout for a pink pillar of light, so eyes up, Guardian.
If you head towards the light you’ll come across a large door, so head through it to the next encounter. The Hexahedron encounter is a bit bonkers - this is the Nine we’re dealing with, after all. You can teleport all around the room but the orientation switches quite rapidly, so watch out for some motion sickness. Just like the previous encounters, you’re collecting Motes. The difference here is that you want to deposit your Motes at the banks where there is a Toland whisp floating nearby a circular object above. Eventually, a pillar of light will form in the centre of the Hexahedron which will transport you to the top. It’ll take you to another cube room, so do the same thing again and wait for the light to appear. There are six rooms in total to navigate through, so keep it at. Keep an eye out for Hobgoblins who can one-shot you with a sniper rifle. Symbols will appear on each side of the Hexahedron and once all six appear, you’ll be teleported to a new area where you’ll need to defeat some Centurion Echos. Collect your rewards then head towards the skinny doorway to exit this area.
Once you’re outside, you’ll see a Taken Fallen Captain, so go ahead and follow him for a bit. Eventually, you’ll reach another big doorway, so deal with any enemies, jump on your Sparrow and head inside. You’re going to enter a sort of neon highway that has big Rainbow Road vibes, so try not to follow off the path into the void below. If racing isn’t your forte, you can jump from platform to platform to make your way through this section. Once you reach the end, you’ll be teleported into a new area where you’ll face the final boss: the Kell Echo. Place your Raid Banner when prompted then interact with the whisp to begin the final encounter. The area is shaped like a triangle, much like the Motes, and Taken enemies will appear in each corner. They’ll be immune to damage so what you need to do is get rid of the Mote bank nearest each Captain. Kill a Knight, grab the Motes then bank them in the appropriate receptacle. Once enough Motes have been banked, the Taken Captain will disappear and an Ogre will appear in its place. Take it down then use the new safe area to your advantage to hide from the onslaught of adds. Once each corner is empty, stand on the glowing purple platform in the middle of the room, where you’ll be transported to a new area. You’ll now be up against the Kell Echo boss. There are several damage phases for this boss, so don’t expect to one-shot him, even with the Witherhoard Exotic Grenade Launcher.
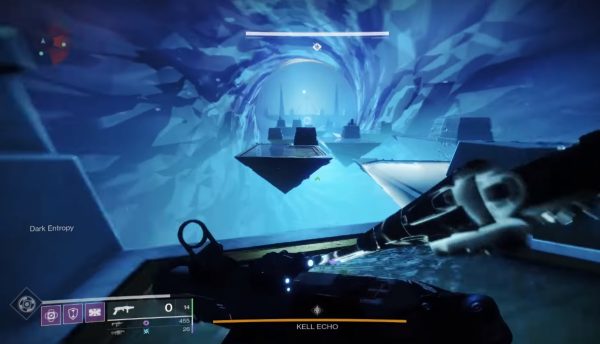
You’ll notice that you’re gaining Dark Entropy throughout this fight, so you want to make sure it doesn’t multiply too high as it will kill you. The closer you are to the Kell Echo boss, the less Dark Entropy you will have, so now’s a good time to equip those high-powered close-quarter weapons we mentioned earlier. Keep chasing the boss and watch out for snipers and other adds, as well as the Blights fired at you because they can kill you or send you flying backwards. You can also race in front of him so he’s pushing you forwards instead of backwards, so keep that in mind. Once you reach the end of the room, he’ll disappear, so jump on the transporter pad to chase after him. You’ll go back into the Mote room, where you’ll need to get rid of the Captains again and defeat the Ogres before facing the boss again.
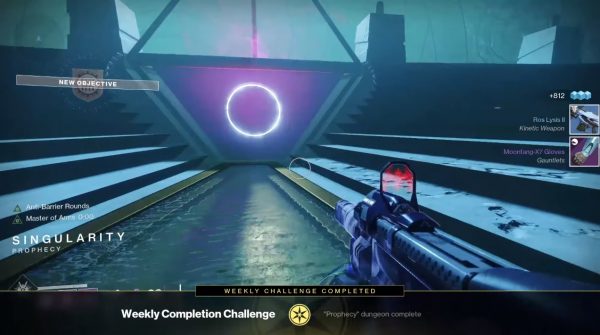
Once he’s down, head towards the giant purple circle you can see on the underside of the final platform. Jump through and you’ll see the Emissary’s big head. Collect your rewards and check your Triumph page to unlock Prophecy Complete. If you want a cool video guide of how to get through the dungeon, check out this video from KackisHD.
You can check out the Season of Arrivals roadmap here, as well as everything we know about Destiny 2: Beyond Light. If you’re just getting started with Season of Arrivals, check out our guides on how to unlock Contact Public Events, earn Umbral Engrams and complete the Means to an End questline, how to get the Witherhoard Exotic Grenade Launcher and unlock the Seed of Silver Wings Artifact. If you’re new to Destiny 2, you can check out our Forsaken guide here as well as how to find Lost Sectors and cache codes.


